Jayco Lift System Repair Manual: A Comprehensive Guide
This manual provides detailed instructions for repairing and maintaining Jayco’s manual winch roof lift systems‚ addressing common issues and offering preventative measures for longevity․
Understanding the Jayco Manual Winch Roof Lift System
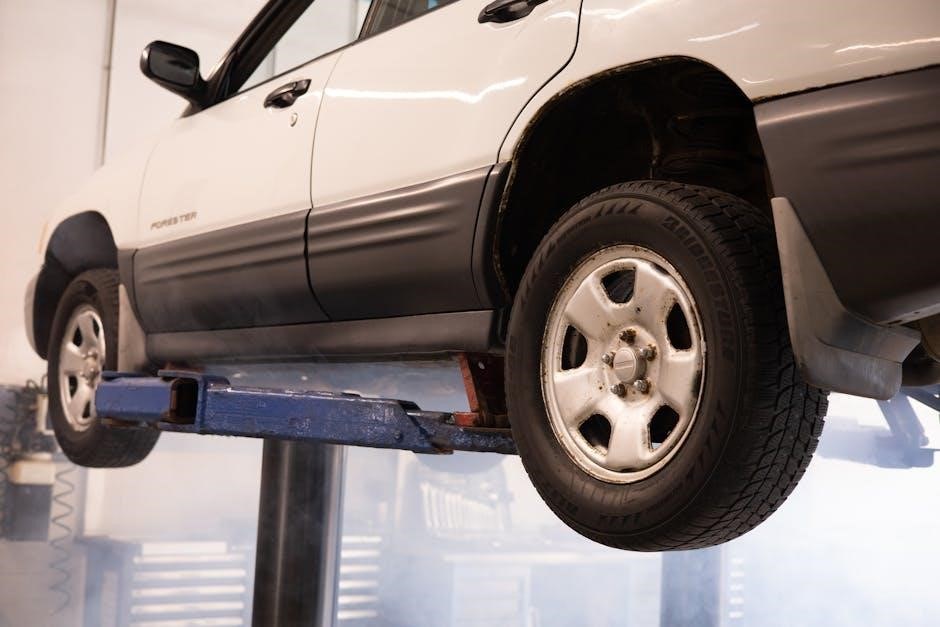
The Jayco manual winch roof lift system is a mechanical assembly designed to easily raise and lower the roof of pop-up campers․ It typically consists of a winch‚ cables‚ pulleys‚ and a supporting framework securely mounted within the camper’s structure․ Operation relies on manual cranking of the winch‚ which draws cables to lift the roof‚ while pulleys redirect force for smoother operation․
Understanding the system’s components is crucial for effective troubleshooting and repair․ Older systems‚ like those found in 25-year-old campers‚ will naturally exhibit more wear and tear․ The entire mechanism is often housed inside the camper‚ screwed to the floor‚ making access for inspection and maintenance essential․ Familiarizing yourself with the system’s animation and operation‚ as provided by resources like Jacka Industries‚ will greatly aid in understanding its functionality and potential failure points․
Common Faults and Failures
Jayco lift systems‚ particularly in older models‚ are prone to specific faults․ Cable issues are frequent‚ manifesting as fraying‚ snapping under stress‚ or becoming tangled within the pulley system․ Pulley wear and tear leads to reduced efficiency and potential binding․ The winch mechanism itself can suffer from slipping – preventing proper roof lifting – or complete binding‚ halting operation․
Misuse and age significantly contribute to these failures․ Neglecting regular inspection and lubrication accelerates wear․ Overloading the roof or forcing the lift system beyond its capacity can cause immediate cable breakage or winch damage․ Troubleshooting often reveals these issues‚ but a systematic approach is vital to avoid further complications․ Addressing these common faults promptly prevents more extensive and costly repairs down the line‚ ensuring continued safe operation․
Identifying Your Specific Lift System Model
Accurate identification of your Jayco lift system model is crucial before attempting any repairs․ While many utilize a manual winch‚ variations exist in cable routing‚ pulley configurations‚ and winch specifications․ Locate the manufacturer’s label‚ often found on the winch unit itself or on the interior support structure of the lift system‚ typically screwed to the camper floor․
Record the model number and any associated serial numbers․ Jacka Industries‚ a key supplier (JACKAJAY product)‚ may have specific documentation for your system․ Knowing the year of manufacture of your Jayco camper also helps narrow down the possibilities․ Online forums dedicated to Jayco owners can be invaluable resources for identifying older or less common models․ Correct identification ensures you obtain the right replacement parts and follow the appropriate repair procedures․
Troubleshooting the Lift System
Systematic troubleshooting is key to resolving lift issues; begin with a thorough inspection of cables‚ pulleys‚ and the winch mechanism for obvious damage or binding․
Initial Inspection: Cables‚ Pulleys‚ and Winch
Before diving into repairs‚ a meticulous initial inspection is crucial․ Start with the cables – carefully examine their entire length for any signs of fraying‚ kinking‚ or rust․ Pay close attention to areas where the cable passes over pulleys‚ as these are common wear points․ Next‚ inspect each pulley for smooth rotation and any cracks or damage to the wheel itself․ Ensure they are securely mounted and haven’t shifted position․
The winch mechanism requires equal attention․ Check for proper lubrication and smooth operation of the cranking handle․ Look for any signs of slipping or binding when attempting to raise or lower the roof․ Inspect the winch’s gears for wear or broken teeth․ A visual assessment can often pinpoint the source of the problem‚ saving time and effort during more complex repairs․ Document any findings with photos for future reference․
Diagnosing Cable Issues: Fraying‚ Snapping‚ and Tangling
Fraying is often the first sign of cable wear‚ appearing as small strands breaking away from the main cable body․ This indicates impending failure and requires immediate attention․ Snapped cables are a more severe issue‚ usually resulting from prolonged fraying or sudden stress․ Thoroughly inspect the entire cable run to identify the breaking point and assess potential damage to surrounding components․
Cable tangling typically occurs within the pulley system‚ hindering smooth operation․ This can be caused by improper cable routing‚ damaged pulleys‚ or a loose winch․ Carefully untangle the cable‚ ensuring it remains properly seated within the pulley grooves․ If tangling persists‚ investigate the underlying cause – a damaged pulley or misaligned system may need repair or replacement․ Always prioritize safety when dealing with potentially stressed cables․
Pulley System Examination: Wear and Tear
A comprehensive examination of the pulley system is crucial for identifying potential issues․ Look for cracks‚ chips‚ or deformation in the pulley wheels themselves‚ as these can cause friction and cable damage․ Inspect the pulley bearings for smooth rotation; any grinding or resistance indicates wear and potential seizure․ Check the mounting points of the pulleys – loose or corroded hardware can lead to misalignment and increased stress on the cables․
Pay close attention to the pulley grooves․ Worn or damaged grooves can cause the cable to jump or fray․ Ensure the grooves are clean and free of debris․ If significant wear is detected‚ pulley replacement is recommended to prevent further cable damage and maintain system efficiency․ Regular lubrication of the pulley bearings is also essential for smooth operation and longevity․
Winch Mechanism Problems: Slipping and Binding
Winch slippage often indicates a problem with the pawl or ratchet mechanism․ Inspect the pawl for wear‚ ensuring it engages firmly with the ratchet teeth․ A worn pawl will allow the winch to backslide under load․ Binding‚ conversely‚ suggests internal friction within the winch gear system; This could be due to lack of lubrication‚ corrosion‚ or damaged gears․
Carefully examine the winch handle and its connection to the gear train․ A loose or damaged handle can contribute to slippage․ Disassemble the winch (if comfortable and with proper guidance) to inspect the gears for wear or damage․ Thoroughly clean and lubricate all moving parts․ If gears are significantly worn‚ replacement is necessary․ Always ensure proper reassembly to avoid further complications and maintain safe operation of the lift system․
Repair Procedures
Detailed‚ step-by-step guides are provided for cable replacement‚ pulley adjustments‚ winch servicing‚ and comprehensive lubrication‚ ensuring a safe and effective restoration process․
Cable Replacement: Step-by-Step Guide
Before beginning‚ ensure the roof is fully lowered and securely supported with locking mechanisms․ Disconnect the winch to prevent accidental operation during the process․ Carefully examine the existing cable’s routing‚ noting the path through pulleys and attachment points – photographs are highly recommended!
Remove the old cable‚ paying attention to how it’s secured at each end․ Clean the pulleys thoroughly‚ checking for wear or damage․ Thread the new cable‚ following the original route precisely․ Ensure proper spooling on the winch drum‚ avoiding overlaps or kinks․
Securely fasten the cable ends‚ utilizing the original hardware or appropriate replacements․ Double-check all connections for tightness and proper engagement․ Slowly and carefully raise the roof‚ monitoring cable movement and pulley alignment․ Lubricate the new cable with a suitable protectant․ Finally‚ test the system multiple times to confirm smooth and reliable operation․
Pulley Replacement: Ensuring Smooth Operation
Begin by fully lowering and securing the camper roof‚ then disconnect the winch․ Accessing the pulleys often requires removing interior panels – document screw locations for easy reassembly․ Inspect each pulley for cracks‚ wear on the wheel‚ or bearing stiffness; even slight damage can cause friction and cable wear․
To remove a pulley‚ detach the cable and any mounting hardware․ Note the pulley’s orientation before removal․ Clean the mounting surface thoroughly․ Install the new pulley‚ ensuring it’s aligned correctly with the cable path․ Reattach the cable‚ verifying smooth movement through the pulley groove․
Test the pulley’s rotation – it should spin freely without binding․ Reconnect all cables and hardware‚ then cautiously raise and lower the roof to confirm proper operation․ Lubricate the pulley bearings with a suitable grease to minimize friction and extend its lifespan․
Winch Repair and Maintenance
Regular winch maintenance is crucial for safe operation․ Begin by disconnecting the winch from the lift system before any inspection or repair․ Check the gear teeth for wear or damage; replace if necessary․ Inspect the pawl – the component preventing rollback – ensuring it engages firmly with the gears․
If the winch slips‚ the pawl may be worn or the gears damaged․ Binding can indicate a lack of lubrication or debris within the mechanism․ Disassemble the winch carefully‚ noting the order of parts․ Clean all components with a degreaser and inspect for wear․
Apply a high-quality grease to the gears and pawl․ Reassemble the winch‚ ensuring proper alignment․ Test the winch’s operation‚ verifying smooth cranking and secure holding․ Regularly lubricate the winch to prevent corrosion and maintain optimal performance․
Lubrication of the Lift System Components
Proper lubrication significantly extends the life of your Jayco lift system․ Begin by cleaning all components – cables‚ pulleys‚ and the winch – removing any dirt or old grease․ Use a degreaser specifically designed for mechanical parts‚ followed by a thorough drying process․
Apply a lithium-based grease to the winch gears and pawl‚ ensuring complete coverage․ For the cables‚ a silicone-based lubricant is recommended; avoid petroleum-based products that can damage the cable fibers․ Lightly coat the cables‚ working the lubricant into the strands․
Pulleys require regular lubrication to minimize friction․ Apply grease to the pulley bearings‚ rotating the pulley to distribute it evenly․ Inspect for any signs of rust or corrosion‚ addressing them before lubricating․ Consistent lubrication prevents binding‚ reduces wear‚ and ensures smooth‚ reliable operation of the entire lift system․
Preventative Maintenance
Regular inspections‚ proper operation‚ and careful storage are crucial for a long-lasting Jayco lift system‚ preventing costly repairs and ensuring safe usage․
Regular Inspection Schedule
Establishing a consistent inspection routine is paramount for maintaining the integrity of your Jayco lift system․ A thorough check should be performed at the beginning and end of each camping season‚ and ideally‚ before and after any extended storage period․ Begin by visually inspecting all cables for signs of fraying‚ kinking‚ or rust․ Pay close attention to areas where the cable passes over pulleys‚ as this is where wear is most common;
Next‚ examine the pulleys themselves for cracks‚ smooth spots‚ or any indication of bearing failure․ Ensure they rotate freely without binding; The winch mechanism requires careful scrutiny; check for smooth operation‚ proper lubrication‚ and secure mounting․ Inspect the mounting points of the entire system to the camper’s roof and frame for any signs of loosening or stress․ Finally‚ a quick operational test – raising and lowering the roof – can reveal subtle issues before they escalate into major problems․ Documenting these inspections will help track wear and tear over time․
Proper Winch Operation Techniques
Correct winch operation is crucial for both safety and longevity of the Jayco lift system․ Always ensure the lifting cables are neatly spooled and free from twists or tangles before commencing․ When raising the roof‚ apply steady‚ even pressure to the winch handle‚ avoiding jerky movements which can strain the cables and mechanism․ Never overspeed the winch; a controlled pace is essential․
During operation‚ constantly monitor the cables and pulleys for any signs of misalignment or binding․ If resistance is encountered‚ immediately stop winching and investigate the cause․ Lowering the roof requires the same careful approach – controlled descent is key․ Avoid letting the roof drop rapidly‚ as this can shock the system․ After each use‚ lightly lubricate the winch gears and cable to minimize friction and corrosion․ Remember‚ a smooth‚ deliberate operation will significantly extend the life of your lift system․
Storage Considerations for the Lift System
Proper storage is vital for preserving the Jayco lift system during off-season periods․ Before long-term storage‚ thoroughly clean the cables‚ pulleys‚ and winch mechanism‚ removing any dirt‚ debris‚ or accumulated grime․ Apply a generous coating of lubricant to all moving parts‚ protecting them from rust and corrosion․ Fully lower the roof and secure it in the down position to relieve tension on the cables․
Store the camper in a dry‚ sheltered location‚ ideally indoors‚ to prevent exposure to the elements․ If outdoor storage is unavoidable‚ cover the camper with a waterproof tarp․ Periodically inspect the lift system during storage‚ checking for any signs of deterioration or damage․ Avoid placing heavy objects on the roof‚ which could stress the lift mechanism․ Following these guidelines will ensure your system remains in optimal condition‚ ready for the next camping season․
Resources and Support
Jacka Industries offers the JACKAJAY product for lift system assistance‚ alongside online forums and readily available repair manuals and diagrams for Jayco owners․
Jacka Industries: JACKAJAY Product Information
Jacka Industries is a key resource for Jayco lift system owners‚ specifically through their innovative JACKAJAY product line․ This product is designed to enhance and potentially replace aging or failing components within the manual winch roof lift system․
The JACKAJAY system often focuses on providing more durable and reliable alternatives to original equipment manufacturer (OEM) parts‚ addressing common wear and tear issues experienced over time․ Information suggests contacting Jacka Industries directly is crucial for understanding the specifics of the JACKAJAY product and its compatibility with your particular Jayco model and lift system configuration․
They offer animation assistance to help owners understand the operation of the manual winch roof lift system․ Details regarding installation‚ maintenance‚ and troubleshooting specific to the JACKAJAY system can be obtained through their official channels‚ ensuring a proper and safe upgrade or repair process․ Exploring their offerings can significantly extend the life and functionality of your Jayco’s roof lift․
Online Forums and Communities for Jayco Owners
Jayco owners frequently share valuable experiences and solutions within dedicated online forums and communities․ These platforms serve as excellent resources for troubleshooting lift system issues‚ exchanging repair tips‚ and locating diagrams or manuals not readily available elsewhere․
Discussions often reveal common faults‚ effective repair procedures‚ and insights into the longevity of various lift system components․ Experienced owners frequently post photos and detailed walkthroughs of their repair processes‚ offering visual guidance for tackling similar problems․
These communities are particularly helpful for older models‚ where official documentation may be scarce․ Searching these forums can uncover solutions specific to your Jayco’s age and lift system model‚ potentially saving time and money on professional repairs․ Active participation and respectful interaction are key to benefiting from the collective knowledge of fellow Jayco enthusiasts․
Locating Repair Manuals and Diagrams
Finding comprehensive repair manuals and detailed diagrams for Jayco lift systems can be challenging‚ particularly for older models․ Jacka Industries‚ the original equipment manufacturer (OEM) for many Jayco lift systems under the “JACKAJAY” product line‚ is a primary source for current information․
However‚ older manuals may require more extensive searching․ Online resources‚ including dedicated Jayco owner forums and RV parts retailers‚ often host scanned copies or links to downloadable diagrams․
Be prepared to identify your specific lift system model number to ensure compatibility․ Sometimes‚ contacting Jayco directly or a specialized RV repair shop can yield access to archived documentation․ Visual aids‚ like exploded views of the pulley and winch mechanisms‚ are invaluable during repairs‚ so prioritize locating those diagrams alongside textual manuals․